Hi All
It's Sunday and time to finally show you how my mandala book mark came to life :)
I think it is a great idea for everyone who loves reading books... I do!!! How about you???
On Wednesday late post you've found out why I decided to make it and today it is time for step by step instruction.
Material Used:
Watercolour paper cut to 15cm/21cm size
Pencil, Fine ink pens, rubber,
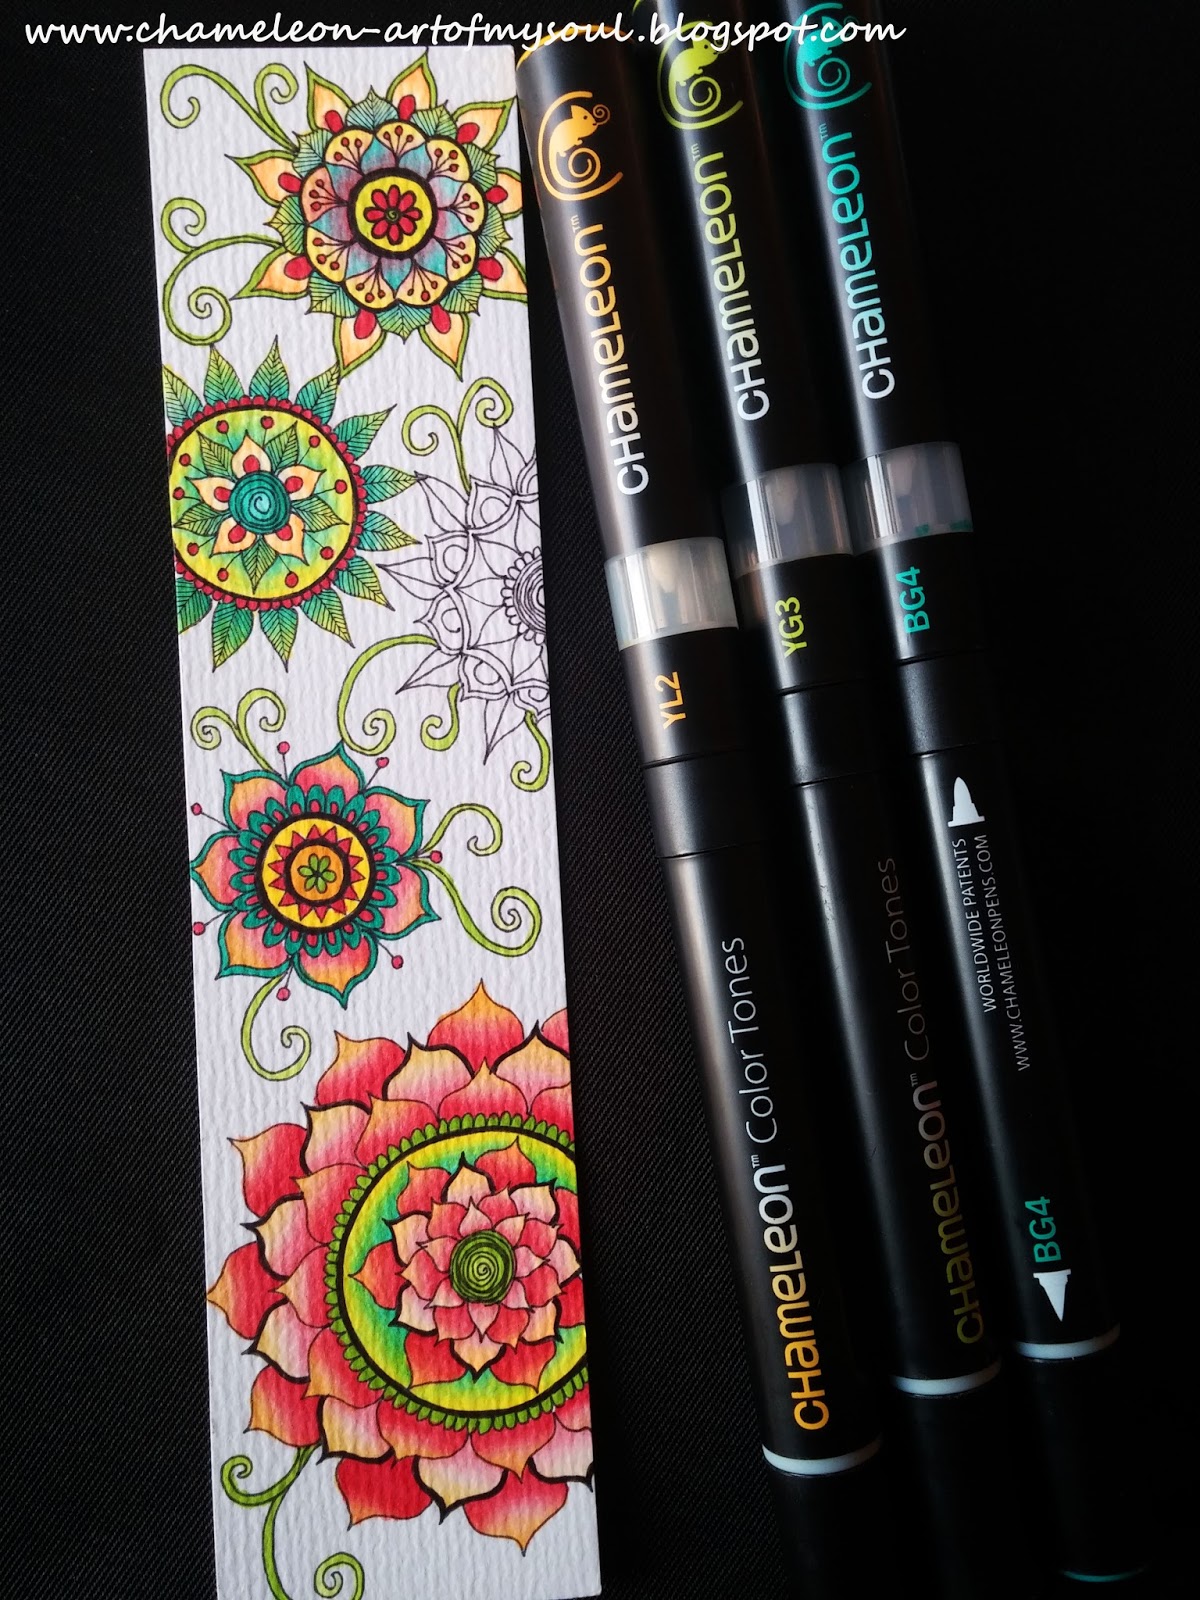
Summer Sun (YL2), Warm Sunset (YO3), Seville Orange (OR4),Crimson Red (RD4), Spring Meadow (YG3), Aqua Marine (BG4)
Witam wszystkich
Jest niedziela i czas w koncu na pokazanie mojej mandalowej zakladki do ksiazek, jak powstawala :)
Mysle ze jest to swietny pomysl dla wszystkich moli ksiazkowych... Ja bardzo kocham czytac ksiazki a wy????
W srode dowiedzieliscie sie dlaczego zdecydowalam sie zrobic ta zakladke a dzisiaj zobaczycie krok po kroku jak powstawala.
Uzyte materialy:
Papier do akwareli przyciety do rozmiaru 5cm/21cm
Olowek, gumka do mazania, cienkopisy Micron i oczywiscie moje ukochane pisaki
Chameleony z setu Deluxe ale tylko 6 kolorow :
Summer Sun (YL2), Warm Sunset (YO3), Seville Orange (OR4),Crimson Red (RD4), Spring Meadow (YG3), Aqua Marine (BG4)
First of all cut the watercolour paper to the right size which is 5cm/21cm
Prepare your tools, pencil, rubber and Micron ink pens
Na poczatku wytnij z papieru do akwareli prostokat o rozmiarze 5cm/21cm
Przygotuj olowek, gumke do mazania i czrne cienkopisy o roznych grubosciach (moze byc tez jeden cieniutki)
Draw mandalas on the cut paper using very fine pencil
Naszkicuj swoje mandale bardzo cieniutkim olowkiem
Use fine black inks to do outlines of your mandalas, Use different sizes of the pens or just one and make some thicker lines as well as the thin once
Popraw linie cienkopisami. zeby latwiej sie robilo grubsze linie lepiej miec cienkopisy roznej grubosci ale jeden cienkiutki tez bedzie odpowiedni, bo bedzie mozna zrobic i cienkie i grubsze linie
Start colouring with Warm Sunset (YO3) brush nib the bigger petals of the bottom mandala. Infuse just for 4 to 5 seconds and colour from the middle to the edges of petals. Then use Seville Orange (OR4) bullet nib and do the same with the smaller petals inside the circle. Infuse just for 1-2 seconds this time.
Ze wzgledu na to ze post jest dosyc dlugi postanowilam ze dalsza instrukcje pozostawie w jezyku angielskim. Nawet jesli nie znacie angielskiego fotografie sa dosyc dokladne krok po kroku a nazwy pisakow i tak zawsze podaje w jezyku angileskim, wiec wystarczy ze przeczytacie pod zdjeciami jakich piskow uzyc.
Podstawowe zasady kolorowania. Do wiekszych powierzchni uzywaj miekkiej koncowki natomiast do malutkich detali tej malej twardszej koncowki.
Kiedy naciagasz pisaka zawsze sprawdz na boku czy to jest ten kolor o ktory ci chodzilo.
Jesli kolorujesz listki lub platki i chcesz uzyc dwa kolory to zwykle uzywa sie ich na odrot,,,,co to znaczy? Ze jeden kolor po naciagnieciu koloruj od srodka do brzegu a drugi kolor na odwrot.
Jesli chodzi o tlo to mozesz szostawic biale natomiast jesli chcesz takie jak u mnie to naciagaj miekka koncowke przez 15-20 sekund lub wiecej aby uzyskac jasny kolor przez dluzszy czas i koloruj tak aby w niektorych miejscach bylo jasniej a w innych ciemniej. Powodzenia :)
Use Crimson Red (RD4) for all petals of mandala. For the bigger petals use brush nib and for the smaller use bullet nib.
Infuse just for few seconds if you want dipper colour and more for lighter colour
Use Meadow Spring (YG3) bullet nib for all spiral strings outside all mandalas (here you can see only one coloured on the bottom mandala) and for the tiny pattern around the circle. Then use brush nib to colour the middle of mandala. Infuse for 3 seconds and colour from the centre to the edge.
Then use Summer Sun (YL2) brush nib to colour left space in between the small petals inside the circle. Infuse for 6 seconds and colour from the petals to the edge of circle. Then use Aqua Marine (BG4) and go in opposite way to Summer Sun. Infuse brush nib for 4 seconds.
Now using Summer Sun (YL2) colour all the leaves on the second mandala from the top. Use bullet nib (infuse for 2-3 seconds) and colour then from the middle to the edges. Then using Seville Orange (OR4) colour the petals infusing bullet nib for 1-2 seonds.
Use Crimson Red (RD4) bullet nib (without infusing ) to colour all tiny dots , patterns around the circle and middles of the petals. Then use Aqua Marine bullet nib to colour all the leaves in opposite way to the Summer Sun and the middle of mandala
For the left space in between the petals use Summer Sun (YL2) and Aqua Marine (BG4) and repeat the moves done with bottom mandala
Use Crimson Red (RD4) and Summer Sun (YL2) to start with the top mandala as on the photo above.
There are all tiny details so if infusing is needed it should be no more than 2-3 seconds and I would recommend bullet nib for this one.
Now use Aqua Marine (BG4) to add some dimensions to the small red petals from the previous photo. Use bullet nib and infuse just for 1-3 seconds and go in opposite way than before. Then do the same with the leaves.
For the outside petals of mandala use Seville Orange (OR4) and Spring Meadow (YG3) and colour as on the photo above.
The petals of the second from the bottom mandala colour exactly the same way as the bottom mandal's petals. Use Warm Sunset (YO3) and then Crimson Red (RD4). Colour all the tiny bits with bullet nib of Crimson Red (RD4). Leave the inside flower.
Use Aqua Marine (BG4) bullet nib to colour frames of the petals and tiny petals around the circle. Then us Summer Sun (YL2) for the space around the tiny triangles and then Spring Meadow (YG3) bullet nib for the inside flower (without infusing) and then to add some green on the space in between the triangles (infuse this time for 4 seconds to make the green really light )
For the last left mandala use Summer Sun (YL2), Seville Orange (OR4) and Spring Meadow (YG3) and colour as on the photo above. Use bullet nib for all the details and if needed infuse just for 1-2 seconds.
The left space in between the petals colour using Aqua Marine(BG4) bullet nib going from the top to the centre (infuse for 1-2 seconds), and then the outside leaves from the top the middle, and the frames around the orange petals, and this time without infusing.
Now use Crimson Red to add colour on the space in between the petals, go in opposite way as with Aqua Marine one.
All most done :)
Now use Summer Sun (YL2) brush nib for the background. Infuse each time for 15-20seconds to get light yellow... if colour goes dark too quick the infuse even longer...
Finished Bookmark!!!!! I love it !!!!!
Skonczona zakladka!!!!! Czyz nie jest piekna ?!!!!
Here as a background I used my other project which isn't finished yet. And I'm really excited to have it done soon and write a nice post about it too.
Tutaj jako tlo do zdjecia uzylam mojego innego projektu, ktory jeszcze nie jest skonczony, juz sie nie moge doczekac kiedy go skoncze i bede mogla sie pochwalic tutaj na blogu :)
And here my beautiful Bookmark with the one of the most inspiring books I've ever red!!!!
A tutaj moja zakladka w uzyciu z jedna z najbardziej inspirujacych ksiazek jakie czytalam !!!!
Looking good!!!! :D
Mam nadzieje ze mimo angielskiej instrukcji podobal sie wam tutorial i ze mogliscie skorzystac ze wskazowek :)